

 By
Your chain won’t send a warning. It wears out quietly, a fraction of a millimeter at a time, and by the time it starts skipping you’ve often damaged more than the chain.
Here’s how to tell when your bike chain is worn out: measure it. Either a chain checker or a plain steel ruler will tell you in about two minutes, and the numbers you’re hunting for are small, between 0.5% and 1.0%.
I learned this the expensive way. I once rode a chain until a fresh one skipped on my old cassette, and I ended up replacing both. These days I measure chains the way I check brake pads, with a tool and not my ears.
Quick Takeaways:
- Chain wear is measured, not heard. The usual replacement point is 0.5% on 11 speed and up, and 0.75% on 10 speed and under.
- A steel ruler works as a ballpark. Twenty four links should span exactly 12 inches, and 1/16 inch extra means replace.
- Symptoms like skipping under load show up late, and a dirty chain or poor shifting adjustment can cause similar trouble.
- Replace the chain early. It costs less than a cassette, and past roughly 1% the cogs are usually worn too.
- If a new chain skips, suspect the cassette.
The Short Version: How to Tell When Your Bike Chain Is Worn Out
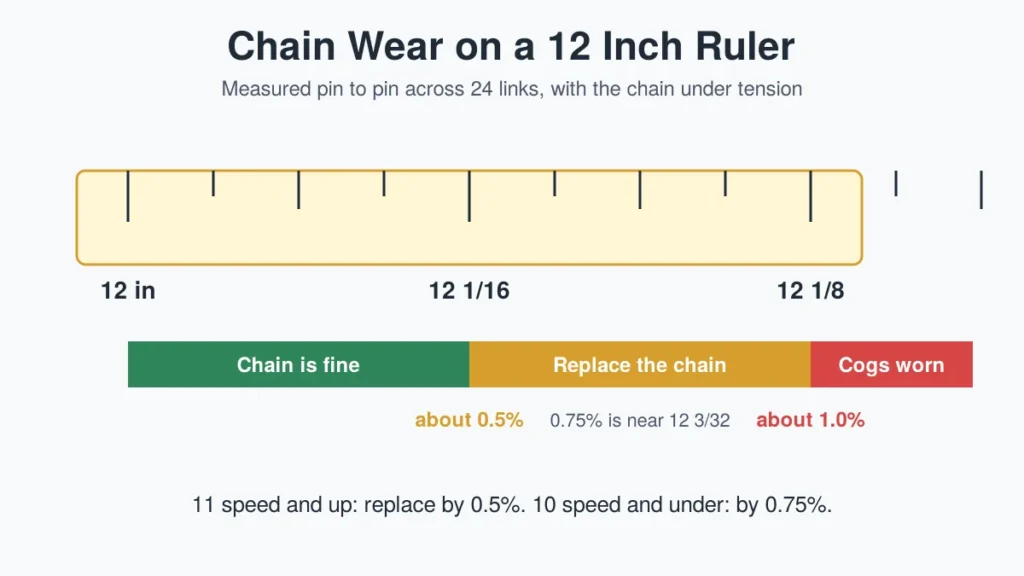
Line a pin up with the zero mark on a steel ruler, then count 24 more pins. On a new chain, that pin lands on 12 inches. If the last pin sits more than 1/16 inch past the mark, Park Tool says the chain is stretched to the point of replacement.
With a chain checker you get the same answer with less squinting. The general guidance is to replace by 0.5% on 11 speed and up, 0.75% on 10 speed and under, and 1.0% on a single speed.
Your drivetrain maker may specify something different, so check their number too.
Why a Chain Wears Out (And Why “Stretch” Is a Misnomer)
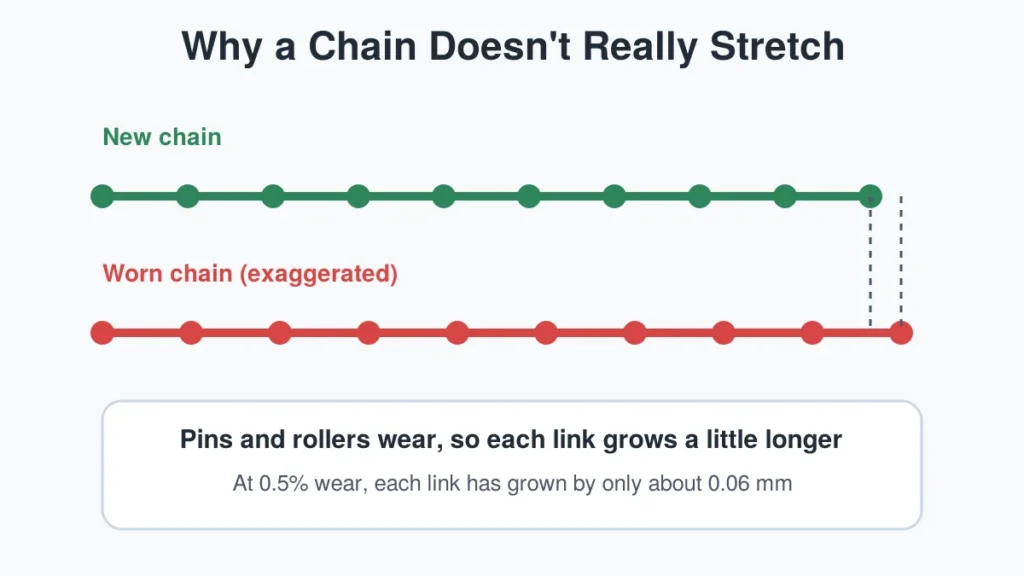
Chains don’t really stretch. Inside the chain, the rivets and rollers wear down, and that gives the illusion of stretching.
Once worn, the chain meshes poorly with the cogs and chainrings. That causes poor shifting and speeds up wear on the cogs.
As a kid, I’d never heard of chain wear. The chain on my Phoenix got oil when it got loud, and that was the whole maintenance plan.
How Little Wear We’re Talking About
Chain pitch is half an inch, which is 12.7 mm. At 0.5% wear, each link has grown by about 0.06 mm. That’s thinner than a sheet of printer paper, which is roughly 0.1 mm thick.
At 0.75%, each link has grown about 0.1 mm, and at 1.0% about 0.13 mm. Across 24 links, 0.5% adds up to about 1.5 mm, which is why a ruler can catch it.
I find that number humbling. You can’t see 0.06 mm, so I stopped trusting my eyes and started trusting a tool.
Signs Your Bike Chain Is Worn Out
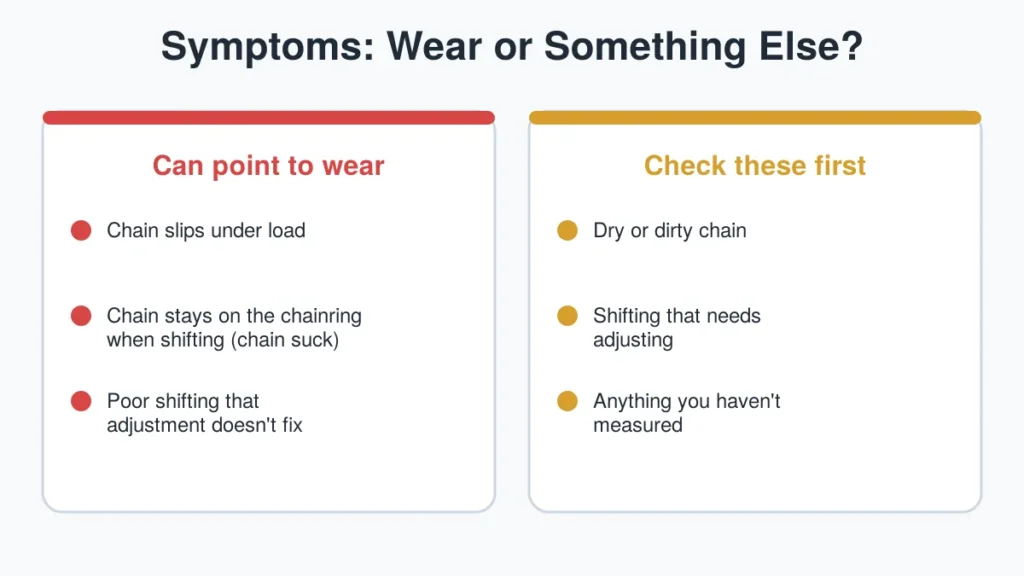
Worn chains do leave clues, but they show up late. Treat them as a reason to measure, not as a diagnosis.
Symptoms That Point to Wear
- The chain slips under load. You stand on the pedals and the drivetrain skips or jumps.
- Chain suck. The chain staying engaged on one chainring when you shift to another under load, so it binds and hangs on.
- Poor shifting that doesn’t improve after adjustment.
Look Alikes to Rule Out First
Before you blame wear, make sure your shifting is dialed in and your chain is clean and lubed. That’s good advice, because those two problems can feel a lot like a tired chain.
- A dry or dirty chain. A noisy chain on one of my rides turned out to be dry, not worn. Five minutes with lube fixed it.
- Shifting that needs adjusting. A sluggish shift isn’t proof of wear.
Why Waiting for Symptoms Costs You
Skipping is a late warning. Sheldon Brown wrote that once the pin sits past the 1/8 inch mark on a 12 inch measurement, a new chain will almost certainly skip on the worn sprockets, especially the smaller ones.
So the cogs may already be worn to match the chain by the time you notice. Measuring catches the problem while it’s still cheap.
How to Measure Chain Wear: Four Methods Compared
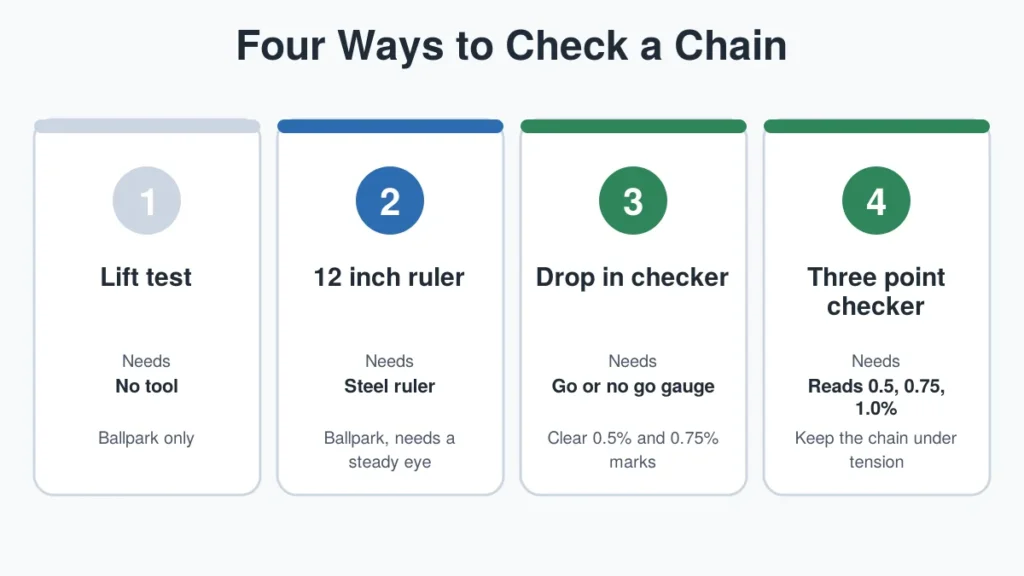
The easiest and most accurate method is a chain wear indicator tool. If you don’t own one, the first two methods get you most of the way.
Method 1: The Lift Test
Shift to the smallest cog at the back and the largest chainring at the front. Then pull the chain away from the chainring.
If you can see a lot of daylight between the chain and the chainring, replace the chain or expect to soon. It’s less accurate than a tool, but it’s a fair starting point if you haven’t replaced the chain in a while.
Method 2: The 12 Inch Ruler
- Line a pin up with the zero mark on a steel ruler. Keep the chain under tension.
- Count 24 more pins. The last pin should sit at the 12 inch mark on a new chain.
- Note how far past 12 inches it lands.
Here’s how the readings translate. I worked the percentages out from the 12 inch length.
| Wear | Pin Position Over 12 Inches | What It Means |
|---|---|---|
| 0.5% | about 12 1/16 in | Replace on 11 speed and up |
| 0.75% | about 12 3/32 in | Replace on 10 speed and under |
| 1.0% | about 12 1/8 in | Cogs are probably worn too |
Reading the Ruler Without Guessing
Line up the center of the pin, not its edge. Look straight down at the ruler, since an angled view shifts the reading. When you land between two marks, round toward the worse one.
Method 3: A Drop In Checker
The quickest tool I know is a go or no go gauge like the Park Tool CC-3.2. Here’s how it works.
- Take the end stamped 0.5 and hook it onto a link with inner plates, so you’re measuring against the roller.
- Try to push the other end into the chain.
- If it goes in, the chain is at least 0.5% worn. Flip the tool over to test 0.75%.
Method 4: A Three Point or Dial Checker
The CC-4.2 contacts the chain in three places and reads 0.5%, 0.75%, and 1.0%. Park Tool says you must keep tension on the short section of chain for an accurate reading.
Sliding gauges like the CC-2 show a percentage in a window. Push lightly until you feel a stop, and don’t force it. Those can give variable results depending on hand pressure.
When to Replace: Wear Limits by Drivetrain
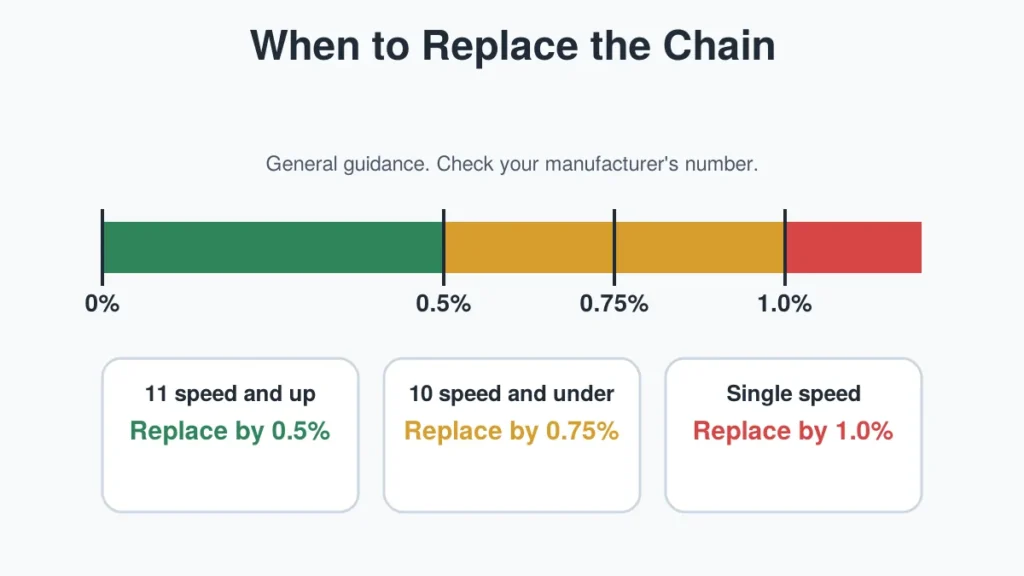
These are general guidelines from Park Tool, and every manufacturer has its own specifications. Replace the chain by the time it reaches the value.
| Drivetrain | Replace By |
|---|---|
| 11 speed or more | 0.5% |
| 10 speed or less | 0.75% |
| Single speed | 1.0% |
I lean toward the lower number on any bike. The chain is the cheap part, and the cassette is the part I’m trying to protect.
What Happens If You Wait
The warning is blunt: using a chain past its limit prematurely wears your cogs and chainrings. Sheldon Brown described the in between zone this way. A chain just past 1/16 inch can be replaced and the sprockets may be fine, but worn sprockets will make the new chain wear quickly.
Past 1/8 inch, expect the new chain to skip. At that point you’re replacing the cassette too.
Three Riders, Three Readings
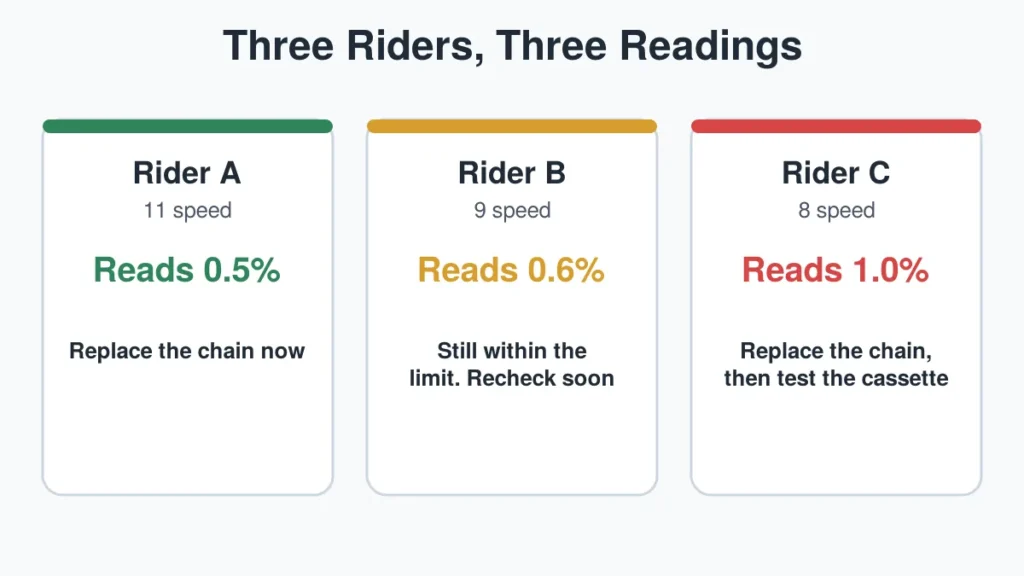
Here are three hypothetical riders to show how the numbers play out.
- Rider A has 11 speed and reads 0.5%. That’s the limit for 11 speed. Replace the chain now.
- Rider B has 9 speed and reads 0.6%. That’s under the 0.75% guideline. I’d recheck soon, and I’d probably replace it anyway, since I lean toward the lower number.
- Rider C has 8 speed and reads 1.0%. Replace the chain, then test ride. Skipping means the cassette needs replacing too.
What to Do After You Confirm Wear
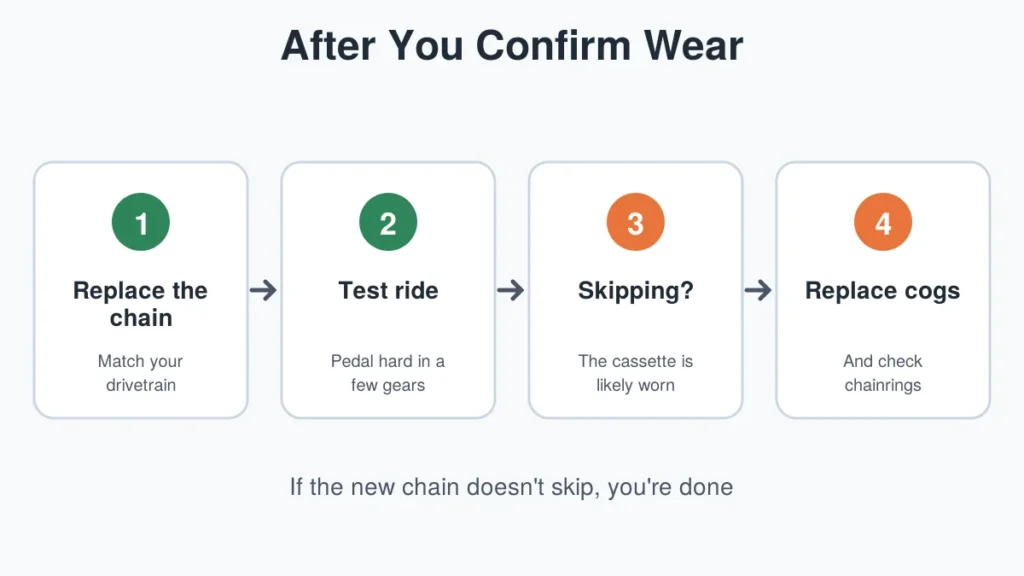
Fit a new chain that matches your drivetrain. Then ride hard in a few gears.
Sheldon Brown notes that the smaller sprockets show wear first, so test those. If the chain skips under load, the cassette is worn. If it runs quietly, you caught it in time.
On my bike, I suspect the chain sailed far past any limit. Single speed chains get more leeway, at 1.0% by Park Tool’s numbers, but I never measured it. I wish I had.
A Two Minute Check Routine
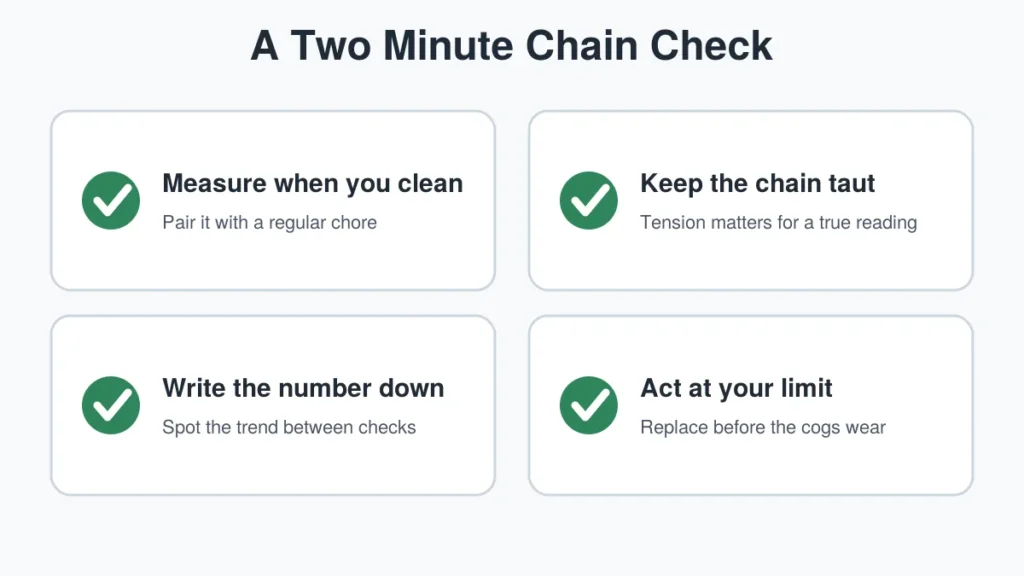
The best check is the one you actually do. This is mine.
- Measure when you clean the chain. Pair it with a chore you already do.
- Keep the chain under tension. Slack gives a false reading.
- Write the number down. I keep a note on my phone with the date. The trend tells you more than a single reading.
- Act at your limit. Order the chain when you’re close, not when it skips.
FAQs About Worn Bike Chains
Will one chain checker work on every chain?
Not always. Park Tool currently describes the CC-3.2 as compatible with most derailleur chains from 5 to 12 speeds, with specific exceptions, but SRAM Flattop and T-Type 12 speed chains need the CC-4.2. Check the tool’s compatibility, and also your drivetrain maker’s replacement advice for your exact chain.
Why does my checker disagree with my ruler?
A ruler is a ballpark method, and sliding gauges can vary with hand pressure. Velo also reports that new chains are rarely a perfect half inch pitch. When the readings disagree, trust a fixed drop in checker and measure again under tension.
Do I need to take the chain off to measure it?
No. You can measure it on the bike, in a stand or on the ground, as long as the bike stays stable. Just keep the chain under tension, because slack gives a false reading. There’s no need to split the chain or take it off.
Does a worn chain damage chainrings too?
Yes. A chain past its wear limit prematurely wears both cogs and chainrings. Replacing chainrings is a bigger job than swapping a chain, so a timely change protects the whole drivetrain, not only the cassette.
What are the ruler limits in millimeters?
A new chain spans 304.8 mm across 24 links. At 0.5% it’s about 306.3 mm, at 0.75% about 307.1 mm, and at 1.0% about 307.8 mm. Millimeter marks are tight and hard to read, so line up the pin center carefully before you decide.
My Rule of Thumb: Replace Early
I replace chains at the lower number every time, even where the book allows more. The chain is the cheap part, and the cassette is what I’m protecting.
If you only do one thing after reading this, measure your chain this week. Write the number down, and you’ll know exactly how fast yours is wearing.
Related Articles
- How to Fix a Flat Tire on a Bike: Step-by-Step Guide
- Hybrid vs Road Bike: A Practical Guide for First-Time Buyers
- How To Start Cycling As A Complete Beginner: Simple Steps
Written by: Raaz | Writer at TheMileRider. Learned to ride late, has spent about two decades on road, mountain, and everything between, and now writes about everything from first rides to brake pad wear limits.